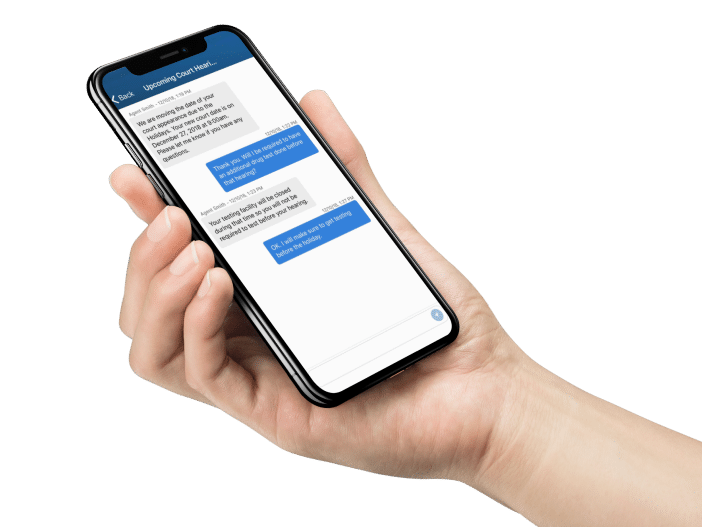
Gain Control in the Palm of Your Hand

Stay connected and informed with all your program’s guidelines & requirements at your fingertips.

<span data-metadata=""><span data-buffer="">Gain Control in the Palm of Your Hand

<span data-metadata=""><span data-buffer="">Stay connected and informed with all your legal commitments at your fingertips.

< Main Page /Mobile App Users

Frequently Asked Questions

Solutions to Common Issues.

Tips & Tricks
How-Tos
Troubleshooting
When you are enrolled into the program you are assigned a unique Client ID and an initial PIN number. You can always change you PIN, but your Client ID will never change. You will need this information to login to Client Mobile and though Client Mobile locally stores your Client ID, if you wait too long between logins, you may have to input both pieces of information in order to access the system.
Though the CourtFact Client Mobile app does not store any private information on your personal device, it does remember your login protocol assigned to you by your monitoring authority. Client Mobile will remember most of your login information for you between sessions. However, we STRONGLY recommend NOT logging out of Client Mobile. Doing so will require you to basically do a complete “first login” attempt every single time you wish to access the system. Instead, just let CourtFact move to the background on your phone. It will automatically end your session after a couple minutes of inactivity anyway.

No matter if you use an apple product or are using the Android operating system, making sure that the notification options are set correctly will help you avoid unnecessarily missing important reminders. Remember, having notifications turned on for Client Mobile is a requirement of your program.

For iOS:

Settings >> Notifications >> CourtFact

  • Ensure that you have “Allow Notifications” toggled ON
  • We recommend Turning on alerts for the Lock Screen, Notifications Center and Banners
  • Set your banner style to “Persistent”
  • Toggle both Sounds and Badgers to ON

For Android:

Settings >> General >> Apps >> CourtFact

  • Ensure that the “Show Notification” option is ticked ON

AND/OR:

Settings >> Sound >> Notifications >> Apps >> CourtFact

  • Ensure that the “None” option is ticked OFF
  • Ensure that the Priority option is ticked ON

CourtFact uses your location for specific functions and having your locations services turned on is a requirement of the program. Locations services aids in a number of functions when ensuring your compliance without your having to provide any direct information to your monitoring authority. Additionally, location services is used to help provide you directions to events and appointments. To ensure that location services are correctly activated follow the steps below.

For iOS:

Settings >> Notifications >> Location Services

  • Ensure “Location Services” is toggled ON
  • Scroll down to CourtFact >> Select Always or While Using the App
    • Tip: Setting this to Always will reduce the number of notifications you get
  • Set your banner style to “Persistent”
  • Toggle both Sounds and Badgers to ON

For Android:

Settings >> General >> Apps >>Location

  • Ensure that Location is toggle ON

Taking good selfies for login

  • Be in a well lit area without direct light on your face
  • Do not wear sunglasses
  • Remove any hats or hoods that might be covering your face
  • Do not have anything obstructing your face

The system will learn your face over time making your Facial ID logins faster, so it is important to take correct selfies at the beginning of your program.

Some users like to kill the app so it does not run in the background. You are required to keep the app open in the background of your device, but more importantly, if you kill the app, you will cause yourself to get more notifications than necessary which can get to be annoying.

CourtFact uses your location for specific functions as we mentioned earlier in the tips and tricks. You are required to allow CourtFact to use your location services while using the application. However, we strongly recommend changing the permission to always use your location so the application does not constantly ask you to log into the application. The application only uses your location when or after you interact with it. If you start the application in a cellular or location impaired area, then having the location services set to “always” will ensure you can login or check-in when you need to by using your last known location. To update your location services to “always” follow the steps below:

For iOS:

Settings >> CourtFact (in app list) >> Location

  • Select “Always” when presented with the different options

For Android:

Settings >> General >> Apps >>Location

  • Ensure that Location is toggle ON

Some environments do not have good cellular or location capabilities. These are usually large building, warehouses or factories. To prevent these things from happening, try turning on these options for the CourtFact app on your smartphone. Since each device is different you may have to search where these options are located, if you have them on your particular version of phone at all:

  • Toggle on the Motion & Fitness option on more recent versions of iPhone and Android
  • Toggle on the Background App Refresh to ensure the app can restart easily
  • Toggle on the Cellular Data option to ensure that you can receive all appropriate notifications

Here are the simple steps to follow the first time you log into Client Mobile by CourtFact:

  • Tap on the CourtFact Client Mobile icon on your phone’s home screen.
  • When the notification popup displays, tap “Allow” in order to allow Client Mobile to send you notifications.
  • Enter your Unique Client ID in the Client ID field.
  • Enter your PIN in the Client PIN field.
  • Tap the bubble next to the terms and privacy statement. (you can read the disclaimer anytime you login to Client Mobile).
  • Tap Login.
  • Tap the “Allow While Using App” option when asked about Location Services. Remember, this is a requirement.
    • If your agency requires a photo to login, you will be required to snap a selfie to login.
    • Tap Login again after your selfie is captured.

That’s it! If you’d like a video tutorial, you can watch the video below.

Here are the simple steps to follow if you want to change your PIN:
  1. Log into the CourtFact Client Mobile application
  2. Click the menu icon in the upper left corner
  3. Scroll down to the “Update PIN” option and tap it
  4. Input your current PIN in the “Current PIN” field
  5. Enter your desired PIN in the “New PIN” field
  6. Retype your new PIN in the “Confirm New PIN” field
  7. Tap “Submit”  to complete the change (you should see a success message at the top of the screen)

That’s it! If you’d like a video tutorial, you can watch the video below.

Here are the simple steps to follow to properly acknowledge Events in Client Mobile:

Method One (Detailed):

  1. Tap on the Events button to enter your Events List
  2. Tap on an Event you wish to acknowledge
  3. Tap the “Respond” button
  4. Tap “Acknowledge” on the acknowledge details screen

Method Two (Quicker):

  1. Tap on the Events button to enter your Events List
  2. Swipe left on the Event you wish to acknowledge
  3. Tap the “Reply” icon (Looks like a swooping arrow)
  4. Tap “Acknowledge” on the acknowledge details screen

That’s it! If you’d like a video tutorial, you can watch the video below.

Here are the simple steps to follow to create your own Events in Client Mobile by CourtFact:

  1. Once logged into Client Mobile by CourtFact, tap on the Events button
  2. Once on your Events List tap on the “Compose” icon in the upper right corner of the screen
  3. Select your Event Type by tapping on the Event Type drop down menu
  4. Next, on Date and use the scroll wheels to select the correct month, day and year
  5. Next tap on the Start Time and End Time fields, and use the scroll wheels to set the correct times
  6. Now enter the address of the Event you can do this by:
    • Tapping on the Common Location drop down and selecting from the locations set by your monitoring authority -OR-
    • Manually filling in the address, city, state and zip code for the Event’s location
  7. If you have everything filled out correctly, tap on the Create Event button

That’s it! You have successfully created an Event. If you’d like a video tutorial, you can watch the video below.

NOTE: Not all agencies allow clients to create Events. If the “Compose” icon does not appear on your Events list screen, you do not have permission to create Events yourself. If you feel this is an important option, you must discuss this with your Case Manager or Officer.

Here are the simple steps to follow to properly complete a Report in Client Mobile:

  1. Once logged into Client Mobile, tap on the “Reports” button to enter your Reports List
  2. Tap on a Report you wish to complete
  3. Ensure you have enough time to complete the entire report before starting
  4. Begin to answer the questions listed
    • Questions can be yes or no, short answer or ask for specific information like addresses or phone numbers
  5. One you have completely answered all required questions, the “Submit” button will appear at the bottom
  6. Tap the “Submit” button
  7. Once the success message appears, tap OK

That’s it! If you’d like a video tutorial, you can watch the video below.

Here are the simple steps to follow to properly complete a Check-In with photo in Client Mobile:

  1. Once logged into Client Mobile, tap on the “Check-In” button to enter the Check-In screen
  2. Tap on the “Photo Check-In” button
    • Your may have to give the application permission to use your camera.
  3. When the camera turns on, take a selfie (or a photo of what your monitoring authority requires)
  4. When you are sure you have the photo correct, tap the “Use Photo” button at the bottom of your screen
  5. Once you have returned to the Check-In screen, select a reason for your Check-In from the Reason drop down list
  6. You can now enter an optional note, though it is not required.
  7. Once everything is filled out, tap the “Check-In” button to complete the Check-In
  8. If everything was successful, you will see a success message, just tap “OK” to be taken back to your home screen

That’s it! If you’d like a video tutorial, you can watch the video below.

Here are the simple steps to follow to initiate a Discussion with you case manager in Client Mobile:

  1. Once logged into Client Mobile, tap on the “Discussions” button to enter the Discussions List
  2. Tap on the Compose button in the upper right-hand corner
  3. When the message window pops up, enter a subject for your Discussion followed by your message
    • This is like a text message so be sure to make your message short and simple
  4. When done, click the “Create” button on the message window
    • You can click the back button to return to the Discussions List

That’s it! If you’d like a video tutorial, you can watch the video below.

Here are the simple steps to follow to read and respond to a Discussion with you case manager in Client Mobile:

  1. Once logged into Client Mobile, tap on the “Discussions” button to enter the Discussions List
  2. Tap on the Discussion thread you wish to read and/or respond to
  3. Tap the message field at the bottom of the screen and type your message
  4. When done typing your message, tap the send button on the right side of the message field

That’s it! If you’d like a video tutorial, you can watch the video below.

Here are the simple steps to follow to check-in for Screening (substance testing) in Client Mobile:

  1. Once logged into Client Mobile, if you are within a Screening Check-In window, the Screening Check-in screen will display
  2. check off all of the required statements to identify you have read and understand the statements
  3. Once the statements are checked, the Check-In button will display
    • Be aware, that if your monitoring authority requires a photo at check-in, you will be required to take a selfie before the Check-In button appears
  4. After your Check-In is complete, you will be presented with your testing status which is either:
    • You do not have to test today
    • You MUST REPORT for testing today
  5. Click the “I Acknowledge” button to complete the check-in
    • If you have been selected for testing, the approved facilities will appear.
    • You can also get directions to any of the facilities by tapping on the one to which you wish to report.

That’s it! If you’d like a video tutorial, you can watch the video below.

Here are the simple steps to follow to view your financial information in Client Mobile:

  1. Once logged into Client Mobile, scroll down to your Financials button
  2. You can see your total due inside the badge on the button.
    • A red value indicates you have at least one item past due
    • A yellow value means you have at least one item currently due
    • A green value means you are up to date on all payments
  3. Clicking on the Financials button allows you to access your ledger for details about items and payments.
  4. At the top of the ledger, you can see how much is past due, currently due and how much is due next with its due date.
  5. Tapping on the menu button, you can also see how much you currently owe in total with the same color coding to let you know if anything is late.

That’s it! If you’d like a video tutorial, you can watch the video below.

Client Mobile by CourtFact works on nearly all current smartphones and operating systems. We have tested devices that are up to 7 years old and despite some slow responses, the application operates just fine. Here are the minimum requirements for the application:

Apple Products:

  • Compatible with iPhone, iPad and iPod Touch
    • We recommend iPhone 5C or newer
  • Requires iOS 9.0 or later

Android Products:

  • Compatible with most Android devices including those manufactured by Acer, Archos, Asus, Casio, HTC, Huawei, LG, Motorola, Samsung, Sony, ZTE and others
    • Some Motorola devices such as the Moto Series do experience login issues. The Android stability with these devices is usually the cause, however, we cannot control the make/OS of your device and therefore cannot prevent all login issues.
  • Requires Android OS 4.4 (KitKat) or later

Possible issues:

  • You do not have your Location Services turned on correctly. Turn on location services for CourtFact Client Mobile.
  • You are using Client Mobile on a WiFi network that does not or is not allowing Geo location services to operate. Switch to cellular on your device, or allow geo location to be enabled on the network.
  • You are not connected to the internet at all. Activate WiFi or cellular on your device.

Remember that you must keep locations services fully activated in order to maintain compliance with the use of Client Mobile.

Possible Issues:

  • You are wearing something that covers your face fully or partially. Remove hats, sunglasses, hoods, etc.
  • You are cutting off part of your face when taking the selfie. Make sure your entire face is in the frame of the selfie you are taking.
  • You have an older phone with a limited camera or no flash. Stand in a well lit area to take the selfie
  • The photo may be blurry. Some older phones take a second or two to complete the photo. Do not pull the phone away until you see the resulting photo taken.

It is important to understand that if you receive a message that says “Face not recognized” you MUST change the photo. Sending the same photo through the system again will not yield a different result. Correct any potential issue as stated above and retake your photo and trying logging in again.

Possible Issues:

  • The Client ID was typed incorrectly. Though the Client ID is not case sensitive, do make sure you are typing it correctly as sometimes weird spellchecks can override your input. The format is any combination of six letters and numbers such as: A1B2C3.
  • The PIN was typed incorrectly. Did you recently change your PIN and forgot to use the new one? Also, the PIN is only numerical, so make sure no letters were typed.

For security reasons, your Client ID and PIN cannot be (or should not be) provided over the phone, however, it is up to your case manager as to how to provide that information to you.

Possible Issues:

  • Your account has been inactivated by both your agency and your provider (you may not always have both an agency and provider.) If either your agency or provider have your account active then you will be able to login.

You MUST contact your agency or case manager, or if you do not have an agency that provided you with CourtFact, contact your program provider. We cannot disclose to you your account status, tell you when your account was inactivated or reactivate the account for you.

Possible Issues:

  • You have a security app on your device that is not allowing local storage of your Client ID. Try disabling that app or adjust the setting to not effect Client Mobile by CourtFact.
  • You are logging into the app too infrequently. Different monitoring authorities will have different protocol, but if you go too long between logins, you will be required to confirm all information again; that is just part of the security features.
  • When exiting the application your are clearing it or logging out. Do not ever log out of the app. The app relies on your usage in order to ensure your compliance is transmitted to your monitoring authority. Logging out or exiting the app can jeopardize your compliance and cause more notifications to be sent to your device.

Possible Issues:

  • You have completely exited or logged out of the app. Log back in and do not completely close down the app.
  • You set your phone down and walked away. On some devices we use the built in accelerometer or gyroscope to see if the device is moving. Pick up the device and keep it in your pocket.
  • Your location services have been disabled or are not working. Re-enable your location services or join a network that allows geo location.

Possible Issues:

  • You may be in an internet impaired area. Try switching networks (cellular or WiFi) or try going to an area with better signal.
  • The app may have tried to update since your last login. Just exit (kill) the app and tap the icon to restart.
  • The app may have been shutdown improperly the last time you used it. Remember not to logout or completely close the app. Just exit (kill) the app and tap the icon to restart.
  • The app needs to be updated but you have automatic updates off. Check to see if there is a pending update and if so, update the app. The app, for security reasons, will not allow you to login unless your application is the most up to date version.
  • The app was still active, but your case manager made a change to your account while the app was active. Just exit (kill) the app and tap the icon to restart.
  • If all else fails, uninstall the app and reinstall. Don’t worry, none of your information will be lost. However, you will have to completely login with all of your credentials.

If the problem persists, we recommend uninstalling and reinstalling the app. This will not effect any other functions or your compliance with the program.

Possible Issues:

  • The feature was added while you were actively in the app. Just exit (kill) the app and tap on the app icon to restart and login.
  • The feature was added while your last session was still active in the background. Just exit (kill) the app and tap on the app icon to restart and login.
  • Your case manager accidentally activated the feature for the wrong client. Contact your case manager and verify that the feature was added to your account. Make sure to have your unique Client ID handy to verify just in case you have a common name that may have been mistaken for another client.

It can take up to five minutes for a new feature to appear once activated by your case manager. Try back in five minutes if none of the above resolve the issue.

Possible reasons:

  • Your case manager sent you a new discussion message. Enter the Discussions module and if you do not see a new message then simply pull down the list and release. That will refresh the Discussions list.

Possible reasons:

  • CourtFact uses your location services to ensure the application is running properly and it is able to locate you when you login, check-in or verify your attendance at an event. Since not all phones have an acceleromter (can tell you are moving) or a gyroscope (can tell what direction your phone is pointing) you may not see this message, however, if you do it is a good idea to give CourtFact permission to use your activity so you do not get constant reminders to login to the app.

Steps to help us fix the issue:

  • Access the menu by clicking the menu button in the upper left-hand corner
  • Scroll down to the “Diagnostics” option and tap it
  • Once on the Diagnostics page, tap the “Submit App Error Logs”
  • Wait until the Success message appears and tap “OK”

If you do not see the Diagnostics option, then it has not been turned on for your account. Contact your service provider to ensure the option gets turned on.

This will send us the error logs generated by your application. You can fill out the form on this page to let us know when you submitted the error logs to help us track down the issue. In most case, the logs indicate an issue with your operating system or instance of the application, but we use this information to continually improve how the application interacts with different versions of operating systems.

Steps to help fix the issue:

  1. Ensure all questions have been answered. Your monitoring authority has ability to make a question required or not, but you will not know that by looking at the question.
  2. If you answer certain questions in a particular way a follow up question may be asked. Make sure you answer any follow up questions that appear.
  3. If a question or follow up question requests certain information like a phone number or address, the app is expecting the information to be entered and formatted. Make sure you did not skip a number in a phone field or leave off the state for an address, etc.
  4. On some models of phones (especially older ones) the submit button will appear but will be below the bottom of your phone’s screen. Scroll down to make sure the button did not appear out of view of your screen.

For privacy and security, we do not store information on your personal device, so once you start a Report it must be finished. However, if you are positive that all information is filled out appropriately, we recommend restarting the app and trying again. Unfortunately you will have to complete the Report over again, but in case your app was shutdown improperly previously, this may resolve the issue.

Steps to help fix the issue:

  1. Close or kill the app and restart.
  2. Ensure you are checking-in during your monitoring authority’s approved window.
  3. If you have to check-in, your app will take you directly to the Screening Check-In screen. If that did not happen, you do not have permission to check-in on the app at that time.
  4. Even though CourtFact will automatically update your app, or tell you when an update is required, you should still make sure you are running the most updated version and that you have automatic updates turned on.

Though this circumstance is extremely rare, it will always have to do with your phone, operating system, app version, permissions on your device or some combination of those items.
Still Have Questions?

Our Support team is here to help.